Amazon Free Usage Tier: Installing Tomcat 7 on an EC2 Linux instance
Introduction
Amazon Web Services offers a free usage tier for 12 months that allows developers to run anything they want in the cloud. The free tier comprises of 14 services of which the EC2 service is of most immediate interest to web developers. EC2 is a service that provides resizable virtual computing by stopping and starting virtual instances of Windows and/or Linux. The Elastic Load Balancing service distributes incoming traffic across instances and will install new instances if failures occur.
Learn all about Amazon Web Services with a 30-day free trial at LinkedIn Learning
Under the free tier offer, a micro instance of Linux or Windows can be installed by selecting a pre-configured Amazon Machine Image. The image installs in your EC2 space where it can be configured stopped and started as required. Security groups can be configured to allow SSH traffic to the instance thereby giving you root access and the power to configure it as if it were installed on a local machine.
In this tutorial, I am going to show how to set up an EC2 instance, install and configure Java 7 and Tomcat 7 via SSH using Putty.
To complete this tutorial I will follow these steps:
- Create an account with Amazon Web Services
- Select an instance
- Download and install Putty
- Configure security groups
- Connect via SSH using Putty
- Download and install Java 7
- Download, install and configure Tomcat 7
- Use Tomcat’s manager to launch a WAR file
Before we get started you might also be interested in my article about setting up Tomcat with Apache and mod_jk cluster.
If you want to learn more about using and administrating Amazon Web Services I recommend the following books and course:
Amazon Web Services Courses at Lynda.com (start your free trial)
AWS Administration – The Definitive Guide
Programming Amazon EC2
Programming Amazon Web Services: S3, EC2, SQS, FPS, and SimpleDB
OK, So let’s get started.
HTTP/2 and Tomcat 9
Now that HTTP/2 specification is official (RFC 7540) the server vendors are working hard to implement the latest specification that will form JavaEE 8. To help you get up to speed you might be interested in my tutorial HTTP/2 in a Nutshell. The features that HTTP/2 introduces are request/response, multiplexing, binary framing, header compression, stream prioritization and server push.
“I’ve hugged a lot of servers in my life, and believe me, they do not hug you back. They hate you.” Amazon CTO Werner Vogels. Tweet this
Tomcat 9 needs to be configured to communicate via TLS in order for HTTP/2 to work in Chrome and Firefox. In my tutorial Configure Tomcat 9 for HTTP/2 I show how to add TLS configs to the server.xml file.
Create an account with Amazon Web Services
To sign up for the 12-month free tier offer you will need to give address details, credit or debit card details and your telephone number. The sign-up form is located here: http://aws.amazon.com/free/ and it takes just a few minutes to complete the process. As a security measure, you will receive an automated telephone call and will be asked to enter a four digit number that appears on the screen into your phone.
Select an instance
With your newly created account, you are ready to select an instance. Log into you account and from the list of Amazon Web Service select EC2.

You will enter the control panel of your EC2 instances. As yet you don’t have an instance installed. To install and instance click the button Launch Instance.

You will be presented with a pop-up menu from which you can select the type of instance to install.

The instance that you choose depends on your requirements and budget. As we are using the free usage tier I suggest that you select the Quick Launch Wizard option and the Amazon Linux AMI 2013.03.01 64 bit instance.
During the setup process, a PEM file will be created, This is used by Putty yo access your instance. See below for further details.
Tip: If you return to the console and cannot see your instance it is likely that you don’t have the correct region selected. In the top right-hand corner of the screen, you can change the region.
Ensure that you enter a name for your instance and create a new key pair. Click continue to install the instance. It may take a few minutes to install and launch the instance. In the meantime, we will download and install Putty.
Download and install Putty
Putty is an SSH client that allows remote access to the root of our Linux instance and can be downloaded from the www.putty.org website. Select the appropriate version for your operating system. While you are there you must also download PuttyGen. This application converts the PEM (Privacy Enhanced Mail Security Certificate) file generated when creating a Key Pair to a PPK file for use in Putty. This file provides authentication when connecting to your instance from Putty.
Once these two applications are installed you must convert the PEM file to a PPK file. Open up PuttyGen and load the PEM file then save it with a PPK extension.

Configure security groups
Security groups give access permission to traffic on specified ports. The SSH protocol uses port 22 and HTTP protocol uses ports 80 and 8080 so we must allow access to traffic on these ports.
The security group configuration is under the Network & Security menu. A default security group will have been set up for you and you now need to enter the inbound ports. Select the security group and click on the Inbound tab.

For each of the three ports select Custom TCP rule and enter the port number. Click add a rule to add it. If there is an ALL group you should delete it. To save the changes click Apply Rule Changes.
Access has no been given to SSH traffic and HTTP traffic.
Connect via SSH using Putty
We are now ready to connect to our instance via Putty.
To configure Putty we need the following information:
- The public DNS of your instance;
- the PPK file we converted from PEM earlier and
- the auto-login name.
The DNS of your instance can be found on the EC2Dashboard and will be in the form: ec2-XX-XXX-XX-XX.us-west-2.compute.amazonaws.com and will vary depending on the region that the instances are installed in.

The auto-login name should be: ec2-user
Launch Putty and on the Session screen enter the Public DNS in the Host Name input box and a name in the Saved Sessions box.

Switch to the Data screen which is under the Connection menu option and enter the username in the login details box. Now switch to the Auth screen which is under SSH and Browse to the location where the PPK file is located.
Return to the Session screen and save the configuration. Click Open to connect.
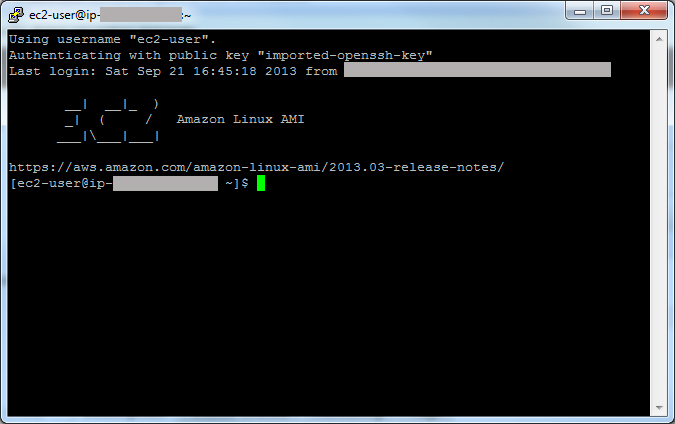
Now you are logged into your instance of Linux on EC2.
Download and install Java 7
Now that we are logged in we will download Java 7. We will need root access so type sudo -i and navigate to the top directory. We are going to download and install Java into a new directory under usr. Create a new directory by doing: mkdir /usr/java and navigate to the java directory.
At the time of writing the latest version of Java 7 was Java SE Development Kit 7u40. So we will download this version. To avoid problems with cookies and the Oracle license we do the following workaround:
wget --no-cookies --header "Cookie: gpw_e24=http%3A%2F%2Fwww.oracle.com"
"http://download.oracle.com/otn-pub/java/jdk/7u40-b43/jdk-7u40-linux-x64.tar.gz"
This should download in less than a minute.
Once downloaded we need to unpack it using tar: tar zxpvf jdk-7u40-linux-x64.tar.gz. This creates the directory jdk1.7.0_40 in which Java is installed.
Now we set the Java Home and will put Java into the path of our users using the following commands:
JAVA_HOME=/usr/java/jdk1.7.0_40/
export  JAVA_HOME
PATH=$JAVA_HOME/bin:$PATH
export PATH
You can verify that Java is installed by doing: java -version this should print out java version “1.7.0_40”.
Download, install and configure Tomcat 7
We are going to download and install Tomcat 7 in the /usr/share directory by running the following two commands:
wget http://ftp.cixug.es/apache/tomcat/tomcat-7/v7.0.42/bin/apache-tomcat-7.0.42.tar.gz
tar zxpvf apache-tomcat-7.0.42.tar.gz
Tomcat will be unpacked and installed in the apache-tomcat-7.0.42 directory. We will now finish by configuring the Tomcat users and setting tomcat to launch automatically whenever the server restarted.
To configure Tomcat to launch automatically create a file called tomcat in the directory /etc/rc.d/init.d/ with the following contents:
!/bin/sh
# Tomcat init script for Linux.
#
# chkconfig: 2345 96 14
# description: The Apache Tomcat servlet/JSP container.
JAVA_HOME=/usr/java/jdk1.7.0_40/
CATALINA_HOME=/usr/share/apache-tomcat-7.0.42
export JAVA_HOME CATALINA_HOME
exec $CATALINA_HOME/bin/catalina.sh $*
I like to use nano to create and edit files but pico works just as well. Next, execute the following commands to set the proper permissions for your init script and enable Tomcat for auto-launch:
chmod 755 /etc/rc.d/init.d/tomcat
chkconfig --level 2345 tomcat on
Tomcat should now be automatically launched whenever your server restarts.
Now we need to set up the Tomcat users. This will allow access to the Manger Console in the Tomcat interface. The users are configured in a file called tomcat-users.xml which is stored in the apache-tomcat-7.0.42/config directory. Open this file using nano and edit the user permissions as below, changing the password as appropriate:
<role rolename="manager-gui"/>
<role rolename="manager-script"/>
<role rolename="manager-jmx"/>
<role rolename="manager-status"/>
<role rolename="admin-gui"/>
<user username="tomcat" password="**********"
  roles="manager-gui,manager-status,admin-gui"/>
<user username="tomcattools" password="**********"/>
We have now configure all that needs to be configured. Go back to the EC2 console and reboot the instance by right clicking on the instance and selecting reboot. This should not take more that a few minutes.
Use Tomcat’s manager to launch a WAR file
Once the instance has rebooted, go to your browser and enter the public DNS of your instance followed by the port 8080. It should look something like this: ec2-XX-XXX-XX-XX.us-west-2.compute.amazonaws.com:8080. You will see the Tomcat Server Home Page. To access the manager application click on the Manager App button on the right-hand side. Enter the username and password that you configured in the tomcat-users.xml file. You will see the web application manager console from which you can upload a WAR file. Scroll down to the Deploy section, from here you can select a WAR file and deploy it into Tomcat.
The URL of your web application will look something like this: ec2-XX-XXX-XX-XX.us-west-2.compute.amazonaws.com:8080/MyWebAppName
Conclusion
I have shown how to set up an EC2 micro.t1 Linux instance, install and configure Java 7 and Tomcat 7 and to deploy a WAR file. The 12-month free tier offer from Amazon Web Services includes much more that the EC2 instances. It is worth taking a look at the Elastic Beanstalk service and how this can be used with Cloud based IDEs and I think you might be interested in my article about Cloud based deployment pipeline.
If you want to learn more about using and administrating Amazon Web Services I recommend the following books:
Learn more about Amazon Web Services on Linkedin Learning
AWS Administration – The Definitive Guide
Programming Amazon EC2
Programming Amazon Web Services: S3, EC2, SQS, FPS, and SimpleDB
If you have any comments regarding this article please feel free to post a reply in the space provided below.
Related Articles
Apache Ant can be used to automate the compilation, deployment and launch of Tomcat all with a simple Ant script. Find out how to automate these task in my article: Compile, deploy and start Tomcat with Ant script.
One of the most valuable configuration files in Tomcat is the server.xml. I have published a blog post of an example configuration: Tomcat server.xml example.
Tomcat is often set up with Apache and mod_jk cluster. In this tutorial, I will demonstrate common configuration for a small production environment: a single tier, load balanced application server cluster.
Installing Tomcat and Java on Linux can be difficult however if you follow this simple guide you shouldn’t have any problems.
The most significant change in Java Enterprise Edition 8 and Java SE 9 will be support for HTTP/2. Tomcat 9 supports HTTP/2 however, the server.xml must be configured to use TLS. Head on over to Configure Tomcat 9 for HTTP/2 to discover how to add the appropriate configurations.
19 Comments on Amazon Free Usage Tier: Installing Tomcat 7 on an EC2 Linux instance
3 Trackbacks / Pingbacks
- Amazon Free Usage Tier: Installing Tomcat 7 on an EC2 Linux instance | alex.theedom
- Set Up an Amazon EC2 Instance with Wildfly, MySQL, Git, Jenkins | Nuwan's Blog
- AWS EC2서버에 Tomcat 설정하기 – 토니네@제주온라인
Great blog post Alex. FYI: I did a similar thing a few months back with Glassfish. Old news to you no doubt, but maybe other readers will find it helpful? http://benwilcock.wordpress.com/2012/07/24/commissioning-glassfish-3-application-servers-on-aws-ec2/
Cheers, Ben
Interesting article Ben. Thanks for the link.
The authentication file is tomcat-users.xml not tomcat-user.xml
Thank you for the feedback. I have amended the article.
Excellent article Alex. Although, all I needed was the section on how to make tomcat start automatically, I really appreciated the rest. It helped to validate one’s knowledge..
Once again, well done…
Great totorial. Everything worked fine until the JDK and Tomcat download. I have to download them and the uplodad through ftp. Versions were a little newer.
I addapt directories names, etc. All right, execpt Tomcat page at port 8080 doesn’t show up.
I don’t know if somethings went wrong or I have a permissions issue. Don’t I have to open 8080 port?
Yep, I had to explicitly open 8080
Yes, by default it has HTTP:80 defined. We need to choose, “Custom TCP Protocol” from dropdown and give 8080 as port number.
looks like jdk url changed, here is a wget which worked for me.
wget –no-cookies –no-check-certificate –header “Cookie:oraclelicense=accept-securebackup-cookie&gpw_e24=http%3A%2F%2Fwww.oracle.com%2Ftechnetwork%2Fjava%2Fjavase%2Fdownloads%2Fjdk8-downloads-2133151.html” “http://download.oracle.com/otn-pub/java/jdk/7u71-b14/jdk-7u71-linux-x64.tar.gz”
It is very interesting by the way. Thanks a lot for sharing your experiment in Amazon EC2
Great article…I have followed all the steps and after rebooting my tomcat is also started in /usr/share/apache-tomcat-7 location. I can see this in logs. But unfortunately when I try to access using the :8080, its not showing up.
Do I need to open the port also please advise.
Yes, by default it has HTTP:80 defined. We need to choose, “Custom TCP Protocol” from dropdown and give 8080 as port number.
Great post! Easy to follow! I have two follow-up questions.
1) How would you get your app to run on just ‘/’ instead of ‘/MyWebAppName’?
2) How would you get tomcat to run on port 80 instead of 8080?
Thanks
Nice post Alex. I also tried my hand doing same thing using eclipse and AWS elastic beanstalk. Putting the link here if anyone else is trying to do this using eclipse: https://techyogics.wordpress.com/2015/08/28/step-2-host-your-website-on-aws-free-tier-using-elasticbeanstalk-in-eclipse-publish-your-own-website
Nice article. Thanks for the link.
Your link of Java doesn’t work
wget –no-check-certificate –no-cookies –header “Cookie: oraclelicense=accept-securebackup-cookie” http://download.oracle.com/otn-pub/java/jdk/7u40-b43/jdk-7u40-linux-x64.tar.gz
I was surfing the web for AWS and I saw your Blog. I read a few of your posts and think they were awesome. Thank you.
Thank you very. I am glad you found my post useful.
I know its late but this answer helped me to get rid of the problem you faced…
https://stackoverflow.com/a/36363296/1790964