Step 4: HTML5 and AJAX interface
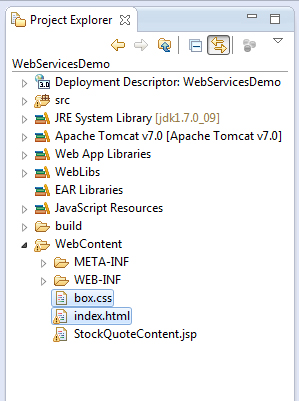
I am going to use HTML5 and AJAX from jQuery to build the interface. I will create two files an index.html file for the interface and a box.css file for the css3 to draw the popup box.
HTML 5 and AJAX (jQuery) interface
2. Starting with the HTML. I need to create the popup html and the stock codes html that the user will hover over with the mouse.
<div id="popup" class="hiddenBox">
  <div>
    <div id="contents"></div>
  </div>
</div>
This code is hidden until a stock quote is to be displayed. It is the place holder for the HTML that the JSP template generated and it is this HTML that will be append to the ‘contents’ div tag.
3. The css is used to give style to the popup and to show and hide it.
.hiddenBox {
  opacity:0;
}

.openBox{
  position: fixed;
  font-family: Arial, Helvetica, sans-serif;
  top:0;
  right:0;
  bottom: 0;
  left: 0;
  background: rgba(0,0,0,0.8);
  z-index: 100;
  -webkit-transition: opacity 400ms ease-in;
  -moz-transition: opacity 400ms ease-in;
  transition: opacity 400ms ease-in;
  pointer-events: none;
  width: 400px;
  position: relative;
  margin: 10% auto;
  padding: 5px 20px 13px 20px;
  border-radius: 10px;
  background: #fff;
  background: -moz-linear-gradient(#fff, #999);
  background: -webkit-linear-gradient(#fff, #999);
  background: -o-linear-gradient(#fff, #999);
}
There are only two styles. The openBox gives the popup all its style; its height and width, color and transition qualities. The CSS is in a separate file call box.css that I import into the HTML.
The stock codes html is a very simple div table and the stock codes are encased in ‘a’ tags. I decided to use HTML5 data tags to store the stock code. This is a very useful new feature in HTML5. The data stored in these tags is easily accessible by javascript and jQuery has its own .data function that retrieves this data.
<div>
  <a data-code="IBM">IBM</a>
  <br>
  <a data-code="MSFT">MSFT</a>
</div>
4. I use jQuery’s implementation of AJAX. First I need to import the jQuery library.
<script type="text/javascript"
  src="http://ajax.googleapis.com/ajax/libs/jquery/1.4/jquery.min.js">
</script>
Then I configure the AJAX call.
<script type="text/javascript">
  $(document).ready(
   function() {
   // When the mouse hovers over the link this event is launched.
   $("div a").hover(
   // Called on the mouse in event.
   function() {
  // AJAX call that fills content in the box
  $.ajax({
  type: "post",
  url: "/WebServicesDemo/getStockQuote",
  data: "code=" + $(this).data("code"),
  success: function(msg){ $('#contents')
  .append(msg);} // Adds content to the box
  });
  // Makes the box visible
  $("#popup").removeClass("hiddenBox")
  .addClass("openBox");
  },
  // Called on the mouse out event.
  function() {
  // Makes the box invisible
  $("#popup").removeClass("openBox")
  .addClass("hiddenBox");
  // Removes the content from the box
  $("#contents").html("");
  }
  )
  });
</script>
In line 5 handle the mouse over event. This event has two sub events. A mouse in and a mouse out. A javascript function can be called on each event firing. When the mouse in event is fired first anonymous function is called. This function makes the AJAX call, line 9. The URL of the servlet is given in line 11 and the stock data is retrieved in line 12 and added to the payload of the request. If the request is processed successfully the ‘success’ function is launched in line 13. This function appends the HTML returned in the response from the servlet to the ‘contents’ div. Then in line 17, the popup box is made visible. On line 21 is the function that is called on the mouse out event. This function hides the popup by swapping the classes on popup div.
This just about wraps up this short step-by-step guide to setting up a web application using a Webservice.
The technology we have used is as follows:
HTML5, CSS3, jQuery and AJAX for the interface and communicating with the server.
Servlet, JSP and Tag Libs to handle the request/response and generate the template.
JAXB to un/marshal the XML returned by the web service.
SOAP and WSDL to set up and communicate with the web service.
The server used was Tomcat 7 and the IDE Eclipse Juno.
I hope you have enjoyed this little demo and please leave any comments below.
4 Trackbacks / Pingbacks
- Step by step guide to setting up a J2EE web application | alex.theedom
- HTML5 and AJAX interface | alex.theedom
- Step by step guide to setting up a Java EE web application Boost your career with us Professional Java EE Video Training and Tutorials
- HTML5 and AJAX interface Boost your career with us Professional Java EE Video Training and Tutorials
Leave a Reply